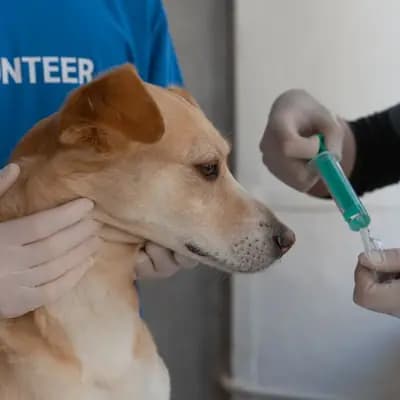
When learning how to remove a tick from a dog, grasp the parasite directly at skin level using tick tweezers, fine-tipped forceps, or a tick card, and pull it straight out slowly and steadily. The entire process takes about 30 seconds. Never use oil, alcohol, or jerky pulling motions, as these cause the tick to regurgitate infectious saliva into the bite wound.
| Factor | Recommendation for Dog Owners |
|---|---|
| Timing | Immediately upon discovery (many pathogens require 12 to 24 hours to transmit) |
| Suitable tools | Fine-tipped tweezers, tick hook, tick card, or tick tweezers |
| Correct technique | Grip close to the skin, do not squeeze the body, pull out slowly and straight |
| Duration | Roughly 10 to 30 seconds of steady, gentle traction until the tick releases |
| Things to avoid (home remedies) | Do not apply oil, glue, nail polish, alcohol, or heat before removal |
| Aftercare | Disinfect the bite site and monitor for redness or fever for up to 3 weeks |
This guide does not replace professional veterinary advice.
How to Remove a Tick from a Dog (Step-by-Step Instructions)
When you need to remove a tick from your dog, staying calm and using the correct mechanics are key to success. Ticks do not bite; they sting: they slice into the skin using their scissor-like mouthparts (chelicerae) and anchor their barbed feeding tube (hypostome) deep within the tissue. Additionally, many species secrete a cement-like substance shortly after piercing the skin that glues their mouthparts firmly in place. Follow these steps to release that anchor safely:
- Prepare your tools and secure your dog: Lay out your removal tool (tick tweezers, pointed forceps, or a tick hook), a mild skin antiseptic, disposable gloves if desired, and a few high-value treats within easy reach. Why it matters: If your dog senses you scrambling nervously for supplies, they will become restless too. How to do it: Have your dog sit or lie down. If they are very fidgety, ask a second person to gently hold them and scratch their ears without pinning them down uncomfortably.
- Part the coat and expose the bite site: Use your fingers to spread the surrounding fur wide apart. Why it matters: In dogs with dense undercoats—such as the Golden Retriever or the Australian Shepherd—you risk catching stray hairs. That pinches, causing your dog to flinch and potentially tearing the tick apart. How to do it: If the fur is stubborn, lightly dampen it with a splash of clean water so it stays parted, giving you a clear view of the skin surface.
- Grasp the tick directly at the skin surface: Position your tool as close to your dog's skin as possible, gripping only the tick's head and mouthparts. Why it matters: The engorged gray or brown abdomen is essentially a balloon filled with blood, gut bacteria, and viruses. Squeezing this body acts like a syringe, forcing infectious stomach contents and saliva straight into your dog's bloodstream. How to do it: Slide the notch of a tick card or tick hook flat against the skin under the parasite, or place the tips of fine tweezers right at the base where the tick enters the skin.
- Pull straight out slowly with steady pressure: Pull the tool away from the bite site smoothly, steadily, and perpendicularly. Why it matters: Because of the backwards-pointing barbs and cement secretion, the skin will initially resist. Jerking or twisting abruptly almost always breaks off the feeding apparatus. How to do it: Apply gentle, constant tension and hold it for 10 to 30 seconds. The skin will often tent slightly. Be patient—after a few moments, the tissue yields and the parasite slides out intact.
- Check the tick and safely dispose of it: Inspect the tick to verify the tiny mouthparts are attached to the body and check whether it is still moving. Why it matters: A detached head left behind can cause localized inflammation, and an engorged tick lost in the home can survive and lay thousands of eggs. How to do it: Never flush the tick down the sink or toilet, as ticks easily survive underwater for days. Instead, fold it inside a folded piece of sturdy paper towel and crush it with a hard object (like the bottom of a glass), or drop it into a sealed jar of rubbing alcohol (at least 40 percent).
- Disinfect the wound and reward your dog: Dab the small puncture wound with a pet-safe antiseptic (such as an iodine- or chlorhexidine-based solution), clean your tool, and immediately hand your dog a treat. Why it matters: Disinfecting prevents secondary bacterial skin infections, while the treat creates a positive association so your dog stays relaxed the next time around.
Which Tool Works Best for Your Dog?
There are many tools available designed to remove ticks from dogs. The price tag is irrelevant; what matters is that you feel confident handling the tool and that it matches the size of the tick and your dog's coat type:
- Tick hook (with a V-shaped slit): These small plastic levers slide flat along the skin beneath the tick. Because there are no pinching arms to squeeze together, the risk of crushing the tick's body is virtually zero. They often come in packs of two for tiny nymphs and large adult ticks, working equally well on short and long coats.
- Fine-tipped, curved tweezers: For very small, flat ticks that have not yet fed, or for bites in tricky spots (such as near eyelids or between paw pads), stainless steel micro-point tweezers are ideal. Standard household tweezers with wide, flat edges should never be used, as they inevitably squeeze the tick's abdomen.
- Tick tweezers / forceps: This classic spring-loaded tool opens with a push button. It works well on larger, visible ticks, though dense fur requires careful parting so the grabbing prongs do not pinch the parasite's belly.
- Tick card: Fitting neatly into any wallet, this is a handy tool on the go. On smooth-coated breeds like the Beagle, the notch slides easily beneath the tick. However, on curved body parts (ear flaps, paw pads) or in dense plush coats, a rigid card can be difficult to maneuver.
- Tick lasso: This tool places a fine loop around the tick's mouthparts before pulling taut. It protects the parasite's body, but keeping the loop in place requires a steady hand if your dog is fidgety.
Ticks on Dogs: Timeline from Walk to Follow-Up Care
When a dog encounters ticks, time is initially on your side. Ticks rarely bite immediately and transmit most pathogens only after feeding for several hours. As the Federal Chamber of Veterinarians (BTK) explains regarding tick prevention, ticks become active once ambient temperatures reach around seven degrees Celsius, often crawling through a dog's coat for up to two hours before selecting a thin-skinned attachment site. Veterinary vaccination committees note that many pathogens dormant in the tick's gut are only activated by the warm blood meal, typically requiring 16 to 24 hours to migrate to the salivary glands and enter the dog.
This timeline outlines what is happening and what action to take after every outdoor adventure:
| Timeframe / Phase | What Is Happening (Dog & Tick) | Your Task as the Owner |
|---|---|---|
| 0 to 2 hours after exposure | The brushed-off tick crawls through the coat seeking a warm, thin-skinned area with good blood flow. | Brush down and run your hands over your dog immediately after the walk; pick off any loose, crawling ticks. |
| 2 to 12 hours after the bite | The tick has attached. Exception: TBE viruses reside directly in the salivary glands and can transmit immediately. Other pathogens remain dormant in the gut. | Part the fur in high-risk areas (head, ears, chest) and promptly remove any attached ticks using a tool. |
| 12 to 24 hours of feeding | Pathogens such as Borrelia (Lyme disease), Anaplasma, or Babesia travel to the salivary glands. Transmission risk climbs sharply. | Perform an evening check and thoroughly remove any missed ticks without squeezing them. |
| Day 1 to Day 7 after removal | The puncture wound heals. A small, pea-sized firm lump as a localized immune reaction to tick saliva is common. | Inspect the bite daily: Is the bump shrinking, or is it turning hot, painful, or oozing pus? |
| Week 1 to Week 3 after the bite | Typical incubation window for many tick-borne diseases (such as babesiosis, anaplasmosis, or Lyme disease). | Note the date of the bite on your calendar. Consult a vet immediately if you observe fever, shifting lameness, or lethargy. |
Where Do Ticks Hide on Dogs Most Often?
To avoid wasting time during your post-walk check, focus on the spots parasites target most. A study by the University of Veterinary Medicine Vienna, summarized by the companion animal parasite council ESCCAP, tracked 90 dogs over a year to highlight this exposure: owners discovered a total of 700 ticks, and nearly every second monitored dog contracted a tick-borne infection during the study period. The research also revealed that ticks consistently latch onto the areas of the dog that brush against tall grasses and brush first.
Check your dog thoroughly in these high-priority zones:
- Head and muzzle: Around the lips, along the bridge of the nose, and right along delicate eyelid margins (tiny, pinhead-sized larvae and nymphs love these spots).
- Ears: Along the thin outer leather as well as deep within the ear folds and behind the ear base.
- Neck, scruff, and chest: Right beneath collars or harnesses where warmth and moisture collect.
- Legs and paws: In the armpits, along inner thighs, and inside the webbing between each toe.
- Belly and tail base: Along the sparsely-haired groin line, lower abdomen, and around the perianal area.
Common Tick Removal Mistakes — And What to Do Instead
Outdated advice regarding ticks on dogs continues to circulate. Many well-intentioned home remedies cause the parasite extreme stress, resulting in the exact opposite of what you want and endangering your dog's health.
Myth 1: Smothering with oil, nail polish, glue, or alcohol
Older advice often suggested suffocating the tick before removal with cooking oil, butter, nail polish remover, alcohol, or liquid glue so it would release on its own. This is the single most dangerous mistake when you remove a tick from a dog. Ticks breathe through microscopic openings along their flanks (spiracles) and can easily survive for hours without fresh air. Dousing the tick with irritating or oily liquids triggers extreme physiological stress. In its death throes, the tick empties its stomach and gut contents—along with any pathogens—directly into the bite wound. What to do instead: Always extract the parasite dry using pure mechanical traction. Apply antiseptics only after the tick has been fully pulled out.
Myth 2: Applying heat or freezing sprays
Using lighters, hot match heads, or over-the-counter freezing sprays on your dog is dangerous. Beyond the risk of painful burns to your dog's skin and coat, any sudden thermal shock (even temperatures around 35 to 40 degrees Celsius) stimulates massive salivary secretion in ticks. What to do instead: Rely strictly on a well-designed extraction tool without any prior thermal intervention.
Myth 3: Should you twist or pull a tick out?
Few questions stir as much debate among pet owners as whether you should twist a tick clockwise or counterclockwise. The biological reality is straightforward: tick mouthparts do not have a screw thread; they have backward-facing barbs. As expert organization ESCCAP Germany highlights regarding proper tick removal, twisting with standard tweezers or forceps is not recommended, as it frequently shears the delicate mouthparts, leaving them embedded in the skin.
Why do some people still recommend twisting? It comes down to the tool: when using tweezers, a tick card, or regular forceps, always pull straight out. If you are using a specialized slotted tick hook, however, its unique geometry allows for a gentle rotation around its axis, rolling the barbs free from the surrounding tissue. If a tick refuses to release after 30 seconds of straight traction, a minimal, ultra-gentle wiggle can help loosen the cement bond—never forcefully crank or unscrew it with tweezers.
Myth 4: Pinching the tick off with bare fingernails
If you discover a tick away from home without equipment, it is tempting to pinch it off with your thumb and forefinger. On an engorged tick, however, grasping only the microscopic mouthparts without compressing the swollen abdomen is nearly impossible with bare fingers. Furthermore, if you have tiny abrasions or micro-cuts on your fingers, pathogens released from a burst tick can transmit directly to you. What to do instead: Keep a tick hook clipped to your leash bag or a tick card in your wallet. If you are truly caught without supplies, use only clean, long fingernails placed precisely against the skin surface to lift the base of the tick without squeezing its belly.
When to See a Vet: Warning Signs After a Tick Bite
In most instances, the bite wound heals uneventfully once you remove the tick from your dog. However, common European ticks—including the Sheep Tick (Ixodes ricinus), the rapidly spreading Meadow Tick (Dermacentor reticulatus), and the Brown Dog Tick (Rhipicephalus sanguineus) often imported from warmer travel destinations—transmit dangerous diseases. These include Lyme disease (Borreliosis), anaplasmosis, ehrlichiosis, tick-borne encephalitis (TBE), and life-threatening babesiosis (often called "dog malaria," which destroys red blood cells).
Contact your veterinarian promptly if you notice any of these red flags in the days or weeks following a bite:
- Lethargy and fever: Your dog becomes listless a few days to weeks after the bite, refuses food, seems depressed, or runs a fever (a dog's normal body temperature ranges between 37.5 and 39.0 degrees Celsius).
- Mobility issues and joint pain: A stiff gait, difficulty getting up, swollen joints, or shifting lameness (limping on the left front leg one day and the right rear leg two days later) are classic hallmarks of systemic infections like Lyme disease or anaplasmosis.
- Discolored urine and pale gums: If your dog's urine turns dark yellow, reddish, or tea-colored, and their gums or inner eyelids look porcelain-white or jaundiced, suspect babesiosis immediately. This is a veterinary emergency requiring prompt intervention.
- Neurological symptoms: Tremors, loss of balance, a tilted head, or hypersensitivity when touched around the neck and spine can signal TBE or advanced babesiosis.
- Severe local infection or spreading rash: If the initial bump does not recede after several days, but instead swells significantly, feels hot, oozes, or develops a bullseye-like circular redness (which is often difficult to spot under thick, pigmented dog skin), your dog needs medical evaluation.
- Ticks in delicate spots or defensive behavior: If a tick is attached right along the eyelid rim, deep inside the ear canal, or if your dog reacts defensively out of pain or fear, do not force the issue at home. A vet can remove it safely in seconds. If your dog gets anxious during grooming and care routines, practicing cooperative care and medical training will help them tolerate handling calmly over time.
Frequently Asked Questions
What happens if the head gets left behind when removing a tick from a dog?
First off: what remains is usually not the tick's actual head and brain, but rather the broken feeding tube (hypostome) and mouthparts. Once the main body is gone, the transmission risk drops drastically because the gut and salivary glands have been removed. In most cases, your dog's immune system treats this tiny chitin fragment like a splinter and expels it naturally over a few days. Do not dig deep into the skin with sharp needles, as this introduces bacteria. Simply disinfect the site and keep an eye on it. If the area swells, becomes hot, or shows signs of infection, have your vet take a look.
Is a small lump normal after removing a tick from a dog?
Yes, a small, firm, non-painful bump about the size of a pea or lentil is a standard local tissue reaction. While feeding, the tick injects proteins that cause a mild immune response (a tick granuloma). These nodules typically resolve on their own within one to two weeks. However, if the lump grows rapidly, turns hot to the touch, becomes painful, or oozes discharge, get it checked by a vet.
How can I tell if it is a tick or a skin tag / wart on my dog?
Particularly on senior dogs or when a tick has just attached, telling them apart can be tricky. Part the fur in bright light and zoom in with your smartphone camera. A tick has eight small, dark legs visible right where the body meets the skin. An attached tick is usually smooth, tear-shaped or oval, with a leathery gray, brown, or dark red tint, and only its tiny tip is buried in the tissue. In contrast, a skin tag, wart, or nipple grows out of the dog's skin, matches the surrounding skin tone (often with a textured or cauliflower-like surface), and never has legs. Never pull on a bump with tweezers until you have clearly spotted the legs.
Should I remove a tick from my dog if they are on tick prevention?
Yes, absolutely. Many preventive medications (such as oral chewables or certain spot-ons) work systemically: the tick must bite and ingest blood to absorb the active ingredient and die. Other products act as repellents, yet during peak tick season, an occasional parasite still makes its way into the coat. Whenever you spot a tick—dead, shriveled, or still crawling—remove it right away. Pairing vet-recommended parasite prevention with daily post-walk coat checks gives your dog the best protection.
When is tick season for dogs?
Peak tick season traditionally runs from March through October, with major spikes during mild, humid spring and early autumn months. However, because ticks become active whenever ground temperatures consistently hit around seven degrees Celsius, mild winters mean ticks can be active nearly all year long. Dogs can pick up hardy species like the Meadow Tick even in December or January while exploring leaf litter. A quick coat check should be part of your routine in every season.
Stay Prepared Throughout Tick Season
Finding a tick on your dog is a standard part of dog ownership—but with the right tool and a calm, steady hand, removing it is simple and low-stress. By skipping ineffective home remedies like oil, checking your dog's head, ears, and chest after trail walks, and keeping an eye out for any unusual symptoms in the weeks ahead, you keep your pet healthy and happy. On HonestDog, you will find plenty of expert guides covering dog health, grooming, and care—and if you are currently looking for a furry companion that fits your lifestyle, our Breed Finder is here to help you make a responsible choice.